
Series 2400 Cast Hatch Weld-In or Bolt-On Installation Instructions
Proper installation and maintenance will insure years of service.
| The FREEMAN hatch is designed to give low maintenance, watertight protection and easy, quick-acting operation for ready access below deck. Proper installation will insure trouble free operation of the FREEMAN hatch. |
INSTALLATION:
It is important to install the hatch ring correctly into the deck, bulkhead, wall, plate or other location. The ring into which the hatch is placed must remain flat in all applications. If the ring sealing surface is not flat, the gasket will not form a good seal. Deck camber or other deviation from a flat surface should be taken into account when mounting the ring.
WELDING SPECIFICATIONS:
Refer to the following specifications for the appropriate welding consumables:
- Aluminum Ring (356): ANSI/AWS, D1.2 Structural Welding Code, Aluminum
- Steel Ring (A36): ANSI/AWS, D1.1 Structural Welding Code, Steel
- Stainless Steel Ring (304 or 316): MIL-STD-1689, Fabrication, Welding and Inspection of Ships Structures
| Items needed to complete this job |
|
WELDING:
In a welding application, take special care to cut the hole as close to the ring size as possible.
Heat build-up caused by weld-filling a gap can cause the ring to distort.
The proper welding sequence can also prevent distortion.
After assuring a good fit, from below deck uniformly tack the ring to the deck with 1" welds.
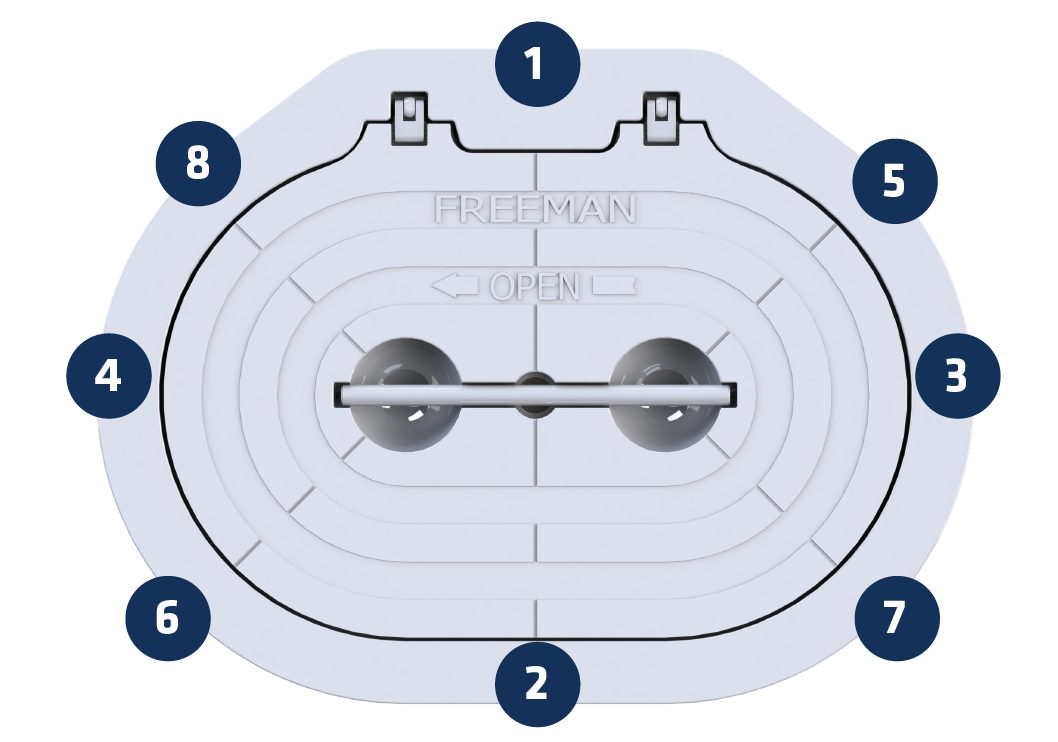
These welds must be made according to the sequence below:
- Complete one 1” tack weld at position #1 (below).
- Tack weld at position number #2 - as far as possible to the opposite side of the coaming.
- Tack weld at position number #3 - as far as possible from the last tack weld.
- Continue tack welding, being sure that each one is as far as possible from the last.
- Tack welding is complete when the welds are 6” apart along the entire perimeter of the coaming. This alternate spacing is critical to prevent overheating and distortion of the coaming.
- When tack welding is complete, from topside, fully weld the perimeter of the coaming.
 CAUTION: Do not overheat the hinge pocket when welding a hinged ring into place. Due to the proximity of the hinge bushings to the outer edge of the hinge pocket overheating can cause meltdown of the bushings, and loss of watertight integrity.

BOLTING:
For bolt-in installation, the aluminum ring comes with a flange. A neoprene gasket of approximately 50 durometer or a quality bedding compound is recommended between the flange and the deck. Isolators should be installed between the stainless steel bolts and the aluminum deck ring/coaming.
INSIDE ESCAPE HANDLE:
If an inside escape handle is included, slide the handle onto the shaft with handle facing away from the mechanism and align the hole in the shaft to the hole in the handle. Drive the supplied stainless steel knurled pin into the hole, smooth end first. BE CERTAIN TO SUPPORT THE CENTER SHAFT WHILE DRIVING THE PIN.
ADJUSTMENT:
The FREEMAN hatch is designed to open and close with uniform tension each time. Adjustment of this tension is best completed with the cover plate in place in the ring (after the ring is installed, or before installation if inaccessible from below) and with the mechanism in the closed position.
THIS ADJUSTMENT IS IMPORTANT!
It will insure proper gasket seal. The locking arms extend out to the underside of the ring on the mechanism side. Each locking arm is slotted, and slides over a threaded stud. A nylon washer, stainless steel washer and nylon insert locknut fit over the stud to hold the arm in place. Tighten or loosen the locknut as needed so that tension on each arm is the same. Do this to each arm. The hatch handle should turn with relative ease, yet all of the locking arms should be rigid when the hatch is closed. This adjustment should be done when the hatch is first installed and periodically as required to keep the hatch sealing properly. A properly installed and adjusted hatch cover will have the same amount of tension on each locking arm.