
Cast Hatch Center Bushing Replacement
Share
Proper installation and maintenance will insure years of service.
|
Items needed to complete this job
|
|
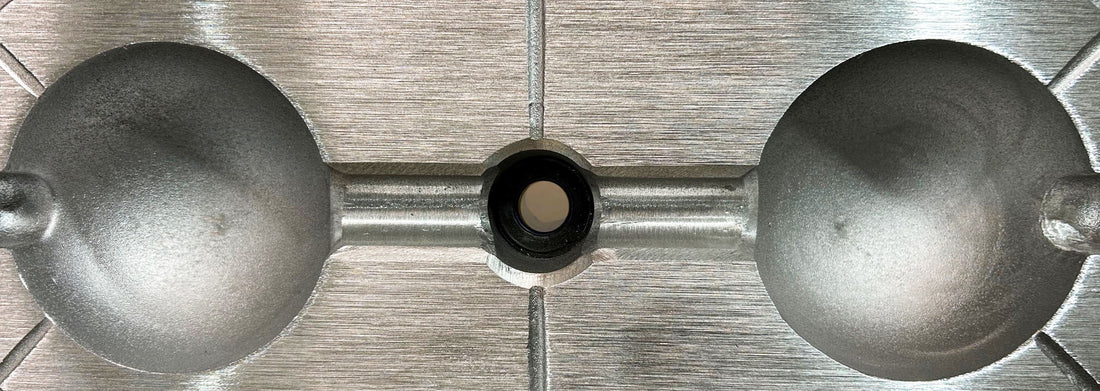
These instructions are for the replacement installation of the center bushing into a cast hatch. The O-ring is installed into the bushing and the required knurl pin has been supplied.
The hatch may have a stainless steel sleeve cast in place. If the hatch being worked on has an “S” stamped on the underside the stainless sleeve is cast into the hatch.
If there is NO “S” then the stainless sleeve has been seated into the hatch. Unless the sleeve is damaged there is no need to remove or replace it.
- Fully support the center shaft of the hatch on a sturdy work surface. Using a ¼” pin punch, drive the pin out of the actuator or escape handle on the bottom of the shaft. The knurled end should be the first end out.
- Remove actuator from shaft.
- Remove the handle from the cover plate assembly.
- Use a 15/16” / .9375 outside diameter round stock [steel rod, socket, etc.] to drive the old bushing out.
- Clean the recess in the cover thoroughly. It is necessary to remove all foreign material from the center hub area, down to bare metal. If this area is not properly cleaned you may not obtain proper adhesion and sealing of the new bushing.
- Once the center hub area has been cleaned down to bare metal a solvent such as acetone or an aluminum etch such as ZEP-A-LUME should be used to wash down the area.
- Seal the bushing into the recess with SIKAFLEX 1-A or other marine grade adhesive/sealant. Be certain to coat the center hub area where the bushing meets the cover casting with the adhesive/sealant.
- Using a driver with a flat surface that is approximately 1-1/2 “ diameter [larger than the top of the bushing O.D.], gently TAP the new bushing into place. Once it bottoms out do not attempt to drive it further.
- Lubricate the O-ring, inside of the bushing with marine grade grease.
- Slide the handle back into place. It should slide into place with relative ease if the O-ring has been lubricated.
- Coat the knurl pin with Tef-Gel or other suitable lubricant.
- Slide the actuator or escape handle onto the shaft with the handle arms pointed down.
- Align the hole in the shaft with the hole in the actuator or handle.
- Carefully support the center shaft.
- Drive the knurled pin into the hole - SMOOTH END FIRST.