
Inspect all gaskets every six months, looking for tears, cracks or breaks.
Gaskets must be replaced periodically in order to maintain the closure’s proper seal.
| Items needed to complete this job |
|

Gasket Removal:
- Remove existing gasket.
Gasket Groove Preparation:
- The gasket groove should be clean and free of corrosion, debris and other materials.
Painted Surfaces: take care not to scratch, mar or chip painted surfaces; thoroughly clean the gasket groove with non-petroleum based adhesive solvent; if paint has been marred or chipped, the bare aluminum surface must be primed and painted before proceeding; follow paint manufacturer’s instructions regarding bare metal surface preparation, application and curing
Bare Metal Surfaces: clean, bare metal should be exposed to ensure good adhesion and sealing of the new gasket; a wire brush or die grinder can be used to help accomplish this task; thoroughly clean the gasket groove with aluminum cleaner
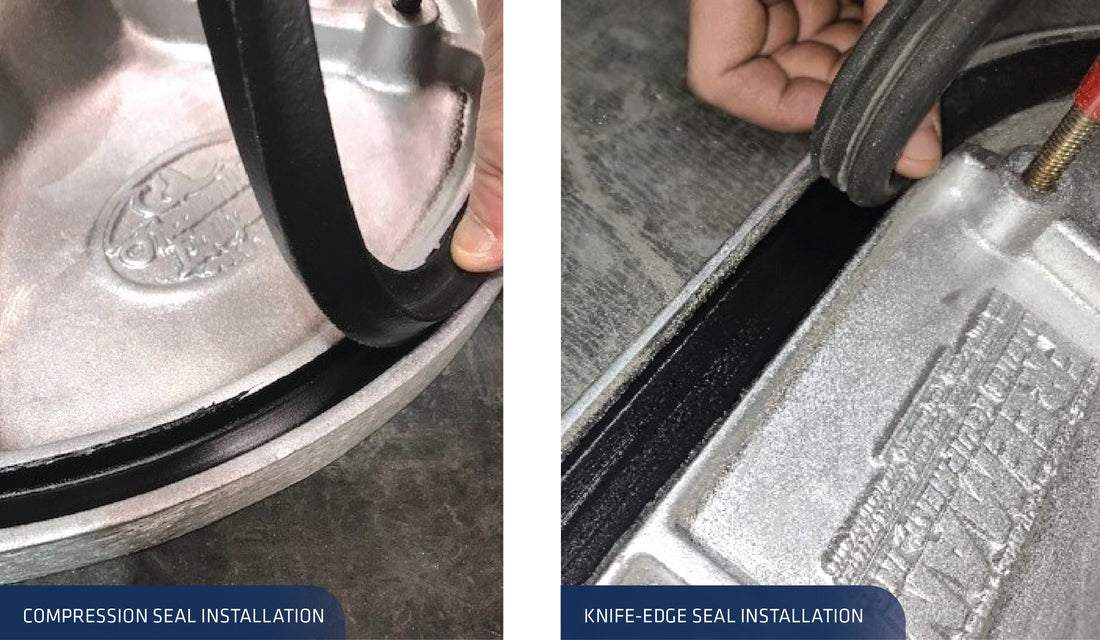
Gasket Installation:
- Position the closure so that the groove into which the gasket will be placed is facing up
- Apply a bead of marine adhesive/sealant in the center of the gasket groove, filling and spreading the adhesive/sealant to a consistent film of 8-10 mil thickness in the gasket groove
- Clean the new gasket material with a clean rag and non-petroleum based solvent
- If necessary, cut the gasket to proper length; do not stretch the gasket to fit
- Clean both ends of the gasket material and allow to dry
- Apply a thin coat of general purpose high performance instant adhesive to the surface of one end of the gasket; align the ends and press firmly, holding in place until secure, following adhesive manufacturer’s recommendations for curing time
- Place the gasket into the groove so that its shape is not distorted or stretched, applying firm, consistent pressure
- Use low-tack adhesive tape to hold the gasket in position, taping the entire radius to hold the gasket securely in place and under slight pressure; dogging the hatch or door in the closed position after tape is applied will help achieve a uniform fit, making sure perimeter is clean and free of any remaining residue prior to dogging
- Cure adhesive/sealant according to manufacturer’s instructions

Adjustment:
Adjustment should be done when the hatch is first installed, and periodically as required to maintain proper sealing. Adjustment is critical as it will ensure proper gasket seal after re-installation.
The Freeman Marine hatch is designed to open and close with uniform tension. Adjustment of tension is best completed with the cover plate in place in the ring (after the ring is installed, or before installation if inaccessible from below) and with the mechanism in the closed position.
The locking arms extend to the underside of the ring on the mechanism side. Each locking arm is slotted, and slides over a threaded stud. A nylon washer, stainless steel washer, and nylon insert locknut fit over the stud to hold the arm in place. Tighten or loosen the locknut as needed so that tension on each arm is the same. Do this with each arm. The hatch handle should turn with relative ease, yet all of the locking arms should be rigid when the hatch is closed. A properly installed and adjusted hatch cover will have the same amount of tension on each locking arm.
Dog adjustment from the topside of the hatch (Paper Test):
- Loosen all the dogs to the point of no resistance on the handle.
- Place a piece of paper on the deck ring near where one of the dogs will engage when closed.


- Tighten the dog adjustment nut one turn on that dog.

- Close the hatch and turn the handle to dog the hatch. If you can pull the paper out with little resistance, the dog needs tightened. Open the hatch and repeat steps 2 and 3.Only proceed one turn on the nut per cycle.
- Continue this process until the paper resists being pulled out.This dog is now correctly adjusted without being over tight.

- Repeat steps 1-5 on each dog. From this point you should be able to place the paper anywhere on the deck ring, and not be able to pull the paper out. You should be able to dog the hatch without a lot of effort.
ISO 755-02-05
REV 22FEB2022